Wednesday, September 28, 2016

Happy birthday

Hi everyone ,

Today a mermaid card for you, i love the new mermaid fluffy.

Her eyes are so pretty and sparkle.

I color her with my Twinkling H2O , more blue and green colors.
The base card is pink and design papers from the romantic summer line .


I made a big rosette and a paper dolly on top.
Some piece of light pink lace and a strip of design paper.

The mermaid on top of all those piece of papers and lace.
Some sea diecuts and leaves dies, little real shells, in the shells i put a little pearl in it.
For the extra spark i have used some stickles , love the sparks.


I hope you like my mermaid card ,she is so fun to color.
You can find here and more in the My Bestiesshop, have fun with shopping.

Hugs xx Christa

Thursday, September 22, 2016

Tri Window With Andrea


Hello Besties!  Today we have Andrea with this amazing
Tri Window Card that she has made with her Silhouette Cameo.


She has even given you a tutorial on how to make this.


Card Base:
Plain Coloured Card Stock - 12" x 12"
Open your Silhouette Cameo Software.  Make your work space 12" x 12"
Using your Square Tool (left side task bar) draw a 12" x  8" rectangle.
Now using the Line Tool (left side task Bar) draw a line  2" down from the top across the page from 2" mark across to 10" mark.  Do this again at the bottom of the plain cardstock.
Place your Plain Cardstock on your sticky plastic cutting sheet and cut your Card Base.
Remove the Card Base from your cutting sheet.
Fancy Card Stock for Panels :
On the Software page slide the Card Base to the side.  We are going to make the panels to go on the Card Base.
With the Square Tool draw 2 panels 7 1/2" x 1 1/2" down your page side by side ( I just draw one and right click your mouse on the panel and click duplicate) you have your 2 panels. Making the panels these size give you a nice plain cardstock boarder around your card.
Continue - 2 panels 3 1/2" x  1 1/2"  - 4 panels  1 1/2" x 1 1/2" - 1 panel  6" x 1 1/2" 
This is all the Fancy Cardstock/paper panels you need. Place your fancy paper on your cutting sheet and cut out.
Cut your window panel - mine measured  6 1/2" x 3 1/2" - I purchased the Window cut image from the Silhouette Shop.  If you have one you can cut out with your cutting machine go for it.

                                This is all the cutting you need to do on your Silhouette Cameo

Score Board or Ruler and Score Tool:
Score Base Card:
Place the 12" side of your Plain Cardstock (Card Base) at the top of your Score Board and against left side.
Score,  starting  your first score line at the 2" top cutline  to the second cutline at bottom.
Second score line - at 4" score down to cutline at top and again at the bottom 4" up to the bottom cutline.
Third score line at 8" score from top to bottom through cutline's.
Fourth Score line at 10" score from top to bottom.

Fancy Cardstock/Paper Placement:
One of the 7 1/2" x 1 1/2" cut pieces attach from top to bottom on left hand side of card base.
One of the 1 1/2" x 1 1/2" cut pieces attach at top beside your first  panel and then the second 1 1/2" x 1 1/2" piece at the bottom next to the first piece.
Next going across the top from left to right attach one of the 3 1/2" by 1 1/1/2" and the second piece attach the same way across left to right at bottom.
The third and forth 1 1/2" x 1 1/2" pieces are attached next one at top and one at bottom of the card base.
And last your second piece 7 1/2" x 1 1/2" attach from top to bottom.
With your 4" x 4" centre square you can put a panel with the same fancy paper or just place your coloured image without the panel.

Fold your Card:
Please study the picture of the Card for the folding.


Thank you Andrea for sharing this with us today!!!
We would love to see what you create and would love for you 
to join us at


Also until the end of the month these is a
SALE

Check out both shops to see what is NEW or grab one
you have been wanting.


Happy Crafting


Tuesday, September 20, 2016

Playing in My Planner: Stamp Sets


Hey Besties!!!  Today I am sharing with you what I have done
with my My Besties Stamp Sets.  
These stamp sets have some pretty cute images and sentiments
that can be used in many different ways.

I have decided to deck out my planner.


I use sticker sheets to stamp my images.  Love that you just peel and stick
with the adhesive already on the back and ready to go.

Also you can stamp on regular cardstock and make paperclip toppers


I love these flowers and all the colors you can make them.
I also used my glittler gel pens to color in the dots.


Here are the stamp sets that I have used.
The possibilites are endless with all the goodies and sentiments.


You can find them HERE


Would love to see what you can come up with also.
Share with us on Facebook at

also check out the SALE that is currently happening in the shops.


Monday, September 19, 2016

Garden Dreams Pink Bees 3D


Hello Besties!   Today I would like to share with
you some easy cards with a 3D effect.

I am using the NEW Garden Dreams Pink Bees Downloadable
Paper Pack.  You can find it HERE


You can add flare with just popping up various elements on the papers.

Here I have just printed a second sheet of the same paper and cut 
out the flowers to add on top.


For the second card I printed out one sheet and cut the element out
and placed on a coordinating sheet in the pack.


I also took the edge with the lace trim and cut out to add
another small detail to the card.


Add a sentiment or some other embellishments and have fun.


Check out all the paper packs available at


And also Check out the SALE!


Happy Crafting


Friday, September 16, 2016

Snail friends - In The Garden CD

Hello All and welcome back to 

Sherri's Art Blog!

This Month I have been having some fun creating with another of Sherri's wonderful CD's

In the Garden


 Here are a few pictures of the fabulous images you get in this In the Garden CD

Design Papers
Digital images to color


I have  used the Coloured Printable Images

 from the CD to make gorgeous and fun 3D Images for my cards!

And here they are: 


I hope you will try out some of these wonderful CD's,

I love them and so will you!

Shop for Sherri's My Besties product at her stores online:

MyBestiesShop.com

or at her Etsy Store here.


Love and hugs

Julie xox

Wednesday, September 14, 2016

Thanks


Good morning 
my Besties 

Today, I like to share my card which I have created 
using this beautiful image by Sherri Baldy's 
which you can purchase from here
if you like to hop over my blog 


 Here is DT Inspirational Card 


I love this harvest image ... she is very cute ... quite happy how it has turned out. 

Materials Used 

Bo Bunny Paper Pad - Apple Cider Collection 
Sun/Clouds Die cuts - Spellbinder 
White Cotton Lace 
Raw Brown Twine 
M/Stewart Border Punch 
"Thanks"- Little Yellow Bicycle 
Birds -Nini's Things  
3D Pop Dots 


card size - 14cm x 14cm 

Copic Used 

Skin - E000-E00-E04-E11-E21-R20
Hair - YR31-YR27-YR27-Y17-E53-E93
Dress - V28-V25-V22-V20
Grass- YG97-YG95-YG17-YG03-YG05-G24
Pumpkin- YR27-YR07-YG18-YG21-C9
Sack- E55-E55-E59

Hope you like what I have to share . 
Thank you for stopping by and taking a peek . 

Crafty Hugs 
Rose 

Tuesday, September 13, 2016

Making Faces Besties

Hello All and welcome back to 

Sherri's Art Blog!


Julie here today with some inspiration for you using the

 gorgeous Making Faces range of Besties !

I just love these up close Bestie Images and have used them often over the last few years! Here are just a few: 


Making Faces Lula Bell


Img988 2


Pretty Little Girl


Curley Jean Face Besties


Shop for Sherri's My Besties product at her stores online:

MyBestiesShop.com

or at her Etsy Store here.


Love and hugs

Julie xox


Monday, September 12, 2016

NEW MY BESTIES MEGA KITS AND MORE

Hello Besties!!!!!  
We have SOOOO MANY EXCITING NEW things in the SHOP
 this month (September) ....it's such an exciting time here at the
 Besties Studio with all we have going on Behind the scenes...
We  can NOT WAIT to share them with YOU!

We have NEW Mega Kits.

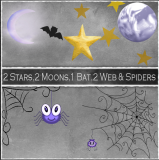
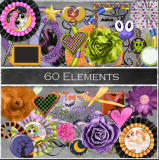
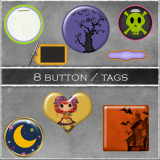
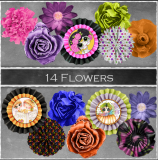
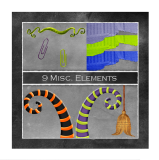
Here is the first one for you, Halloween Purple Moon.

There are tons of fun and exciting elements to create with.
Check it all out


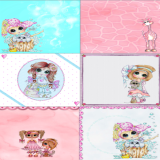
There is also the Bestie Pets Mega Kit


Wait, there is still more NEW and fun things to discover in the shop.


And we can not forget the NEW paper packs


This is just the beginning.
To find MORE, make sure to check out the
at


xoxo
Happy Crafting